 0
komentar
0
komentar
Heres the latest teaser video for the geodesic dome greenhouse! Enjoy!
Read more
Tampilkan postingan dengan label video. Tampilkan semua postingan
Tampilkan postingan dengan label video. Tampilkan semua postingan
Rabu, 11 Mei 2016


Minggu, 08 Mei 2016
Adding the polycarbonate
Here’s the latest in the dome greenhouse series showing the polycarbonate installation. It’s nice having it enclosed and not working out of the wind. It’s still cold, but the heating system is next on the list!
Transcript:
Welcome Back!
This video will show how the exterior of the dome is covered. The northern face of the dome has no polycarbonate and is covered in OSB and will eventually be shingled. Each of the triangle sections needs to have studs added to support the boards. Placing them can be tricky when it’s difficult to reach all the points.
Sometimes the best laid plans don’t always work…
Once all the studs are installed, it’s time to install the OSB. I found it was easier to set the sheathing by ripping the OSB into two foot strips instead of leaving them 4 feet wide. It also reduced the amount of scrap that was generated.
The shed roof and part of the dome are covered in water and ice shield. This will protect the building during the winter and will allow me to shingle the roof in warmer weather. The shielding has an adhesive backing which helps to hold it down to the OSB and a few roofing nails insures a gust of wind won’t peel it off.
The polycarbonate sheets are 6 by 24 feet long. I set up a couple of sacrificial sheets of OSB on the ground as a cutting area.
I decided to repurpose an old tape measure and cut it up so I could easily measure out the various leg lengths for the triangles. With a couple of clamps to hold the ends, it made it easy to triangulate all the points. I found it was easier to make my marks by just poking a nail through the material. Trying to mark the frozen poly with a frozen Sharpie was a futile effort.
The polycarbonate cuts very easily with a sharp circular saw. After I filmed this, I discovered it was even easier if I placed another scrap piece of polycarbonate under it so the blade didn’t have to also cut into the OSB.
Setting up a guide allows for a nice straight cut. After each piece is cut, the protective film can be removed and the sawdust in the flutes is blown out with compressed air.
Installing the panels was quite simple providing there was no wind. Before cutting each panel, I did measure each opening to insure the measurements matched the computer calculations. There were a couple of sections that were slightly off which was probably from slight errors in the hub construction or the strut measurements. But, for the most part they all went in as planned.
Each panel was cut so that the flutes are orientated to allow for condensation to drain out.
Once I got down to the ground level, it was even easier to install each section. All the panels are held in place with stainless steel screws that have a neoprene-backed washer. The screws pierce right through the polycarbonate and the washer creates a watertight seal against it.
All the joints will be taped in the spring since the waterproof tape needs to be applied when it’s over 60 degrees. During this filming it was 20 out. You may have noticed that I’m wearing insulated boots, long-johns, a sweatshirt, insulated hoodie sweatshirt, scarf, winter coat, winter hat under the hoodie, and insulated gloves!
All the panels intersect nicely over the hubs. The original plan of rabbiting each stud so that the panels wouldn’t interfere with the bolts worked out well. Also adding the bevel to the studs made a large flat surface for the panel to rest against.
The panels along the base are cut extra-long so that they will hang over the knee wall. This will help to shed water and prevent it from getting into the dome through the knee wall. The overlapping pieces are simply cut off with a razor knife.
The northern face of the dome that isn’t covered by the shed was also studded and covered with OSB. Unfortunately, my HD camera was broken so I wasn’t able to film this part, but this is what the final construction looked like.
When I laid out the building, I oriented it so it faced due-south. It now acts like a huge sundial and it’s very easy to tell when it’s time for lunch!
That’s it for now. Next up may be the heating system. It’s getting difficult to work in the freezing temperatures! Don’t forget to join our Facebook page!
This phenomenon is called “needle ice” and it occurs when the soil temperature is above freezing and the air goes below freezing. The water in the soil is drawn out by the cold air and quickly freezes, building these long strands of ice. They’re also fun to crush!
Read more
Transcript:
Welcome Back!
This video will show how the exterior of the dome is covered. The northern face of the dome has no polycarbonate and is covered in OSB and will eventually be shingled. Each of the triangle sections needs to have studs added to support the boards. Placing them can be tricky when it’s difficult to reach all the points.
Sometimes the best laid plans don’t always work…
Once all the studs are installed, it’s time to install the OSB. I found it was easier to set the sheathing by ripping the OSB into two foot strips instead of leaving them 4 feet wide. It also reduced the amount of scrap that was generated.
The shed roof and part of the dome are covered in water and ice shield. This will protect the building during the winter and will allow me to shingle the roof in warmer weather. The shielding has an adhesive backing which helps to hold it down to the OSB and a few roofing nails insures a gust of wind won’t peel it off.
The polycarbonate sheets are 6 by 24 feet long. I set up a couple of sacrificial sheets of OSB on the ground as a cutting area.
I decided to repurpose an old tape measure and cut it up so I could easily measure out the various leg lengths for the triangles. With a couple of clamps to hold the ends, it made it easy to triangulate all the points. I found it was easier to make my marks by just poking a nail through the material. Trying to mark the frozen poly with a frozen Sharpie was a futile effort.
The polycarbonate cuts very easily with a sharp circular saw. After I filmed this, I discovered it was even easier if I placed another scrap piece of polycarbonate under it so the blade didn’t have to also cut into the OSB.
Setting up a guide allows for a nice straight cut. After each piece is cut, the protective film can be removed and the sawdust in the flutes is blown out with compressed air.
Installing the panels was quite simple providing there was no wind. Before cutting each panel, I did measure each opening to insure the measurements matched the computer calculations. There were a couple of sections that were slightly off which was probably from slight errors in the hub construction or the strut measurements. But, for the most part they all went in as planned.
Each panel was cut so that the flutes are orientated to allow for condensation to drain out.
Once I got down to the ground level, it was even easier to install each section. All the panels are held in place with stainless steel screws that have a neoprene-backed washer. The screws pierce right through the polycarbonate and the washer creates a watertight seal against it.
All the joints will be taped in the spring since the waterproof tape needs to be applied when it’s over 60 degrees. During this filming it was 20 out. You may have noticed that I’m wearing insulated boots, long-johns, a sweatshirt, insulated hoodie sweatshirt, scarf, winter coat, winter hat under the hoodie, and insulated gloves!
All the panels intersect nicely over the hubs. The original plan of rabbiting each stud so that the panels wouldn’t interfere with the bolts worked out well. Also adding the bevel to the studs made a large flat surface for the panel to rest against.
The panels along the base are cut extra-long so that they will hang over the knee wall. This will help to shed water and prevent it from getting into the dome through the knee wall. The overlapping pieces are simply cut off with a razor knife.
The northern face of the dome that isn’t covered by the shed was also studded and covered with OSB. Unfortunately, my HD camera was broken so I wasn’t able to film this part, but this is what the final construction looked like.
When I laid out the building, I oriented it so it faced due-south. It now acts like a huge sundial and it’s very easy to tell when it’s time for lunch!
That’s it for now. Next up may be the heating system. It’s getting difficult to work in the freezing temperatures! Don’t forget to join our Facebook page!
This phenomenon is called “needle ice” and it occurs when the soil temperature is above freezing and the air goes below freezing. The water in the soil is drawn out by the cold air and quickly freezes, building these long strands of ice. They’re also fun to crush!
Jumat, 06 Mei 2016
Selasa, 19 April 2016
Video of Rescuing a Red Fox

At the end of August 2014, we spotted a very small, very thin juvenile red fox rolling around in the street in front of our house. By the looks of it, we knew it was very sick. It barely had any hair, its eyes were almost sealed shut, and it was so skinny. We contacted our local nature center, the Howell Nature Center, who told us they suspected the fox had mange. They let us know mange is treatable and they asked us to live trap it and bring it in for treatment.
Here is our original post on the little fox that explains more about the rescue. And here is the video of our little foxs survival story. Our hope is that her story helps save other injured animals out there that do have hope if given the chance......enjoy :)
~~~~~~~~~~~~~~~~~~~~~~~~~~~~~~~~~~~~~~~~~~~~~~~~~~~~~~~~~~~~~~~~~~~~~~~~~
Then God blessed them and said, “Be fruitful and multiply. Fill the earth and govern it. Reign over the fish in the sea, the birds in the sky, and all the animals that scurry along the ground.” Genesis 1:28
"Whoever can be trusted with very little can also be trusted with much" Luke 16:10a
~~~~~~~~~~~~~~~~~~~~~~~~~~~~~~~~~~~~~~~~~~~~~~~~~~~~~~~~~~~~~~~~~~~~~~~~~
Blessings,
Lisa
This post has been shared at: Homestead Barn Hop
Dome Teaser video 9
Heres the next teaser video on the dome project. All is going well. Im still scrambling to get the building enclosed before winter set in. Its getting challenging working in this weather...everything is frozen in the morning, then barely thaws during the day, making it wet and slippery.
Minggu, 17 April 2016
The RING Video Doorbell See whos knocking!
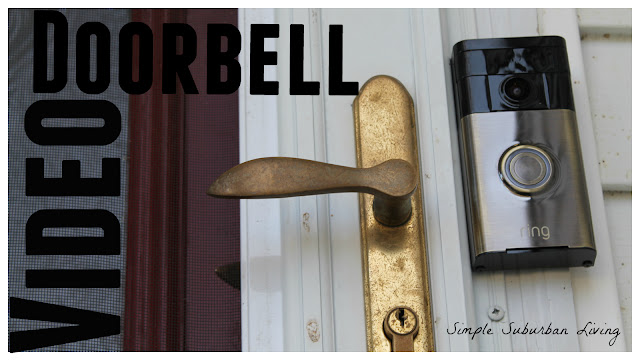
I have recently installed a new video doorbell at our suburban homestead and man is this thing cool! We have been having fun playing with some new technology and thought it would be nice to share the process of installation and what we thought of it with you.
 This is not an official review of the product but I will share my opinion of it so far and what I thought of installation. The Ring video doorbell comes with everything you need to get it setup and installed quickly and easily. The setup comes with an easy to follow guide and as you install the app on your phone it walks you right through connecting to your home wifi. Once connected to wifi you can answer a series of questions and then watch a detailed installation video right from your phone while you install or just follow along the paper instructions.
 Once the doorbell is connected to wifi the next step is to cut power to the current doorbell switch. This can be done by taking one of the wires off of the 24v transformer which is normally in a utility closet, basement, or crawlspace. I installed two of these this week and the second one I could not find the transformer so I hooked it up without cutting power with no issues. The old doorbell should come off pretty easily with a few screws and the wires detached. If you didnt cut the power obviously make sure these wires do not touch each other or you will have all kinds of issues.
The install kit comes with the mounting bracket for any surface, a masonry bit (if needed) and a level that mounts in the bracket for install. Hold the bracket to the desired location and market the four hole locations. Pre drill the holes and then attach the bracket with the provided screws.
Once the bracket is mounted connect the two 24 wires (it doesnt matter which terminal is red or white). Next, the doorbell itself will clip onto the bracket and then then security screws will screw in from the bottom. The doorbell is now setup and working!

From the app on your phone or the RING website you can now setup the motion sensor range and name your doorbells location (ours was "front door"). Now get outside and test it out, it should detect your approach to the door and chime on your mobile device before you even ring the bell. Of course, if you ring the doorbell it should chime in your home and on your device. I did notice a bit of a delay with this on my phone especially when I was not at home but it does work quite well.
The cloud recording subscription saves each interaction on the web and allows you to go back and view any motion triggers or rings of the bell at anytime. We love having this device setup and it is so nice while I am working to just be able to look at my phone to see who is at the door rather than stopping work to answer. I can speak to through the doorbell and they can speak back with me, a great addition and beginning to our "smart home"!
Check out the full video here
The RING Video Doorbell on Amazon
Suburban Living General Store
Please follow us on....
http://www.pinterest.com/simplesuburban/
http://www.facebook.com/simplesuburbanliving
http://www.twitter.com/simplesuburban5
http://www.instagram.com/simplesuburbanliving
http://www.facebook.com/simplesuburbanliving
http://www.twitter.com/simplesuburban5
http://www.instagram.com/simplesuburbanliving
Jumat, 08 April 2016
Dome video 7 Teaser
Another teaser video. Its moving along quickly! Most likely the dome part will go up within the next week!
Read more
Rabu, 06 April 2016
The Better Bell Siphon
This is an explanation of how a traditional bell siphon operates. It goes into some of the physics of how the auto siphon gets started and stops. One of the biggest problems Ive run into is getting them to stop properly on large grow beds. Ive solved this problem with one simple little piece! Its so simple, Im kicking myself for not figuring it out years ago!
This grow bed is using 3/4" pipe for the drain and standpipe with a 2" bell. The fill rate is LESS than 1/2 liter per minute and the siphon still starts with no problem. Its been running for about a week without any problems.
Read more
This grow bed is using 3/4" pipe for the drain and standpipe with a 2" bell. The fill rate is LESS than 1/2 liter per minute and the siphon still starts with no problem. Its been running for about a week without any problems.
Senin, 04 April 2016
Doors Floors and Dome Foam
Made a lot of progress on the inside over the cold winter months.
Heres the transcript:
We’re nearing the end of the project! There will be one more video after this with some of the finishing touches and then I’ll go on to some other videos about the aquaponic setup. You may also notice that some of these segments may look out of order. I was working on everything at the same time depending on the weather, but wanted to group similar segments together to create a better story line.
I needed a large door in the dome so that I could move tanks and grow beds in and out of the building. Garage doors leak a lot of air so I decided to build some custom doors. The doors were framed using 2 by 4’s and pressure treated plywood. When they are completed, they are bolted to some strong hinges and anchored directly into the building’s frame. I still need to add some gaskets and weather stripping to create a good air-tight seal.
I also needed to remove some of the struts from the dome structure to make a larger opening for the equipment. I removed 6 struts and it didn’t seem to make any difference with dome’s structural integrity.
To level out the floor, I brought in several yards of sand and spread it throughout the building. I then racked it out and roughly leveled it out by eye.
Now that the sand was in place, I was able to do a final leveling and compact the area where the stock tank belonged. I decided to place the tank directly on the sand to help protect the base, and save a few dollars by not needing to put brick pavers under it.
To keep the floor from settling over time, I borrowed a plate compactor and compacted the entire area. When this was complete, I also borrowed my neighbor’s laser level and raked out any of the high or low areas, and then compacted everything again.
There are about 5500 bricks that are used in the floor so I made up a couple of carriers which made the job go much quicker! It’s still a lot of work to carry them all in, but at least the bricks remain flat and oriented so that setting them into place is fairly quick. Between carrying them in and laying them out, I average 10 bricks per minute.
To get started, I set a straight string across the floor and lay out a course along the line. This will act as the base reference for the rest of the rows.
The bricks are laid in an alternating, or basket weave pattern and can be adjusted a bit to compensate for their imperfections.
Along the edges, I roughly cut off the bricks so they would fill any gaps that were smaller than a standard brick. Since most of these areas will be covered with grow beds, I wasn’t concerned about making them look perfect. Any remaining voids were filled with gray sand.
The same type of cuts were made around any of the plumbing that comes up through the floor since these areas will also be well hidden by grow beds.
The shed area and northern walls are all insulated to help retain heat during the winter. I decided to use a do-it-yourself spray foam instead of fiberglass batting because of all the odd shapes that needed to be filled. It also will reduce air leaking, and minimize mold. The foam sticks to everything, so I had to protect the polycarbonate from over spraying by stapling painter’s plastic throughout the dome.
Not only does the foam stick to the dome, it also will stick to clothes and skin. Full body protection, goggles, and a respirator is needed!
The foam comes as a complete kit. Each kit contains 2 tanks with A and B parts, hoses, disposable mixing nozzles, and spray tips.
It took a little while to get used to a good spraying technique. The first few cavities were a bit uneven, but once I got a feel for how it worked, I was able to fill the areas better. The kits come with a fan spray for regular stud spacing, and in hindsight, it would have been better to use that tip everywhere.
The biggest problem I ran into was spraying the majority of the foam overhead. My goggles kept getting foam on them and I couldn’t clear them. By the time I was done with a set of tanks, I could barely see anything!
I also insulated my custom-built doors.
The fan tip worked really well at controlling the spray pattern. The foam comes out a bit slower, but you have far more control and a more even fill. To save a little money, I sprayed the standard sized wall cavities with one layer and plan on using standard fiberglass batting.
The knee-wall under the dome is also filled with foam. Once it hardens, it’s easy to cut off any of the excess that sticks out. I then cover the walls with treated plywood.
That’s about it for now. We’ll wrap up the series finishing up the exterior and a few odds and ends. Thanks for watching!
Read more
Heres the transcript:
We’re nearing the end of the project! There will be one more video after this with some of the finishing touches and then I’ll go on to some other videos about the aquaponic setup. You may also notice that some of these segments may look out of order. I was working on everything at the same time depending on the weather, but wanted to group similar segments together to create a better story line.
I needed a large door in the dome so that I could move tanks and grow beds in and out of the building. Garage doors leak a lot of air so I decided to build some custom doors. The doors were framed using 2 by 4’s and pressure treated plywood. When they are completed, they are bolted to some strong hinges and anchored directly into the building’s frame. I still need to add some gaskets and weather stripping to create a good air-tight seal.
I also needed to remove some of the struts from the dome structure to make a larger opening for the equipment. I removed 6 struts and it didn’t seem to make any difference with dome’s structural integrity.
To level out the floor, I brought in several yards of sand and spread it throughout the building. I then racked it out and roughly leveled it out by eye.
Now that the sand was in place, I was able to do a final leveling and compact the area where the stock tank belonged. I decided to place the tank directly on the sand to help protect the base, and save a few dollars by not needing to put brick pavers under it.
To keep the floor from settling over time, I borrowed a plate compactor and compacted the entire area. When this was complete, I also borrowed my neighbor’s laser level and raked out any of the high or low areas, and then compacted everything again.
There are about 5500 bricks that are used in the floor so I made up a couple of carriers which made the job go much quicker! It’s still a lot of work to carry them all in, but at least the bricks remain flat and oriented so that setting them into place is fairly quick. Between carrying them in and laying them out, I average 10 bricks per minute.
To get started, I set a straight string across the floor and lay out a course along the line. This will act as the base reference for the rest of the rows.
The bricks are laid in an alternating, or basket weave pattern and can be adjusted a bit to compensate for their imperfections.
Along the edges, I roughly cut off the bricks so they would fill any gaps that were smaller than a standard brick. Since most of these areas will be covered with grow beds, I wasn’t concerned about making them look perfect. Any remaining voids were filled with gray sand.
The same type of cuts were made around any of the plumbing that comes up through the floor since these areas will also be well hidden by grow beds.
The shed area and northern walls are all insulated to help retain heat during the winter. I decided to use a do-it-yourself spray foam instead of fiberglass batting because of all the odd shapes that needed to be filled. It also will reduce air leaking, and minimize mold. The foam sticks to everything, so I had to protect the polycarbonate from over spraying by stapling painter’s plastic throughout the dome.
Not only does the foam stick to the dome, it also will stick to clothes and skin. Full body protection, goggles, and a respirator is needed!
The foam comes as a complete kit. Each kit contains 2 tanks with A and B parts, hoses, disposable mixing nozzles, and spray tips.
It took a little while to get used to a good spraying technique. The first few cavities were a bit uneven, but once I got a feel for how it worked, I was able to fill the areas better. The kits come with a fan spray for regular stud spacing, and in hindsight, it would have been better to use that tip everywhere.
The biggest problem I ran into was spraying the majority of the foam overhead. My goggles kept getting foam on them and I couldn’t clear them. By the time I was done with a set of tanks, I could barely see anything!
I also insulated my custom-built doors.
The fan tip worked really well at controlling the spray pattern. The foam comes out a bit slower, but you have far more control and a more even fill. To save a little money, I sprayed the standard sized wall cavities with one layer and plan on using standard fiberglass batting.
The knee-wall under the dome is also filled with foam. Once it hardens, it’s easy to cut off any of the excess that sticks out. I then cover the walls with treated plywood.
That’s about it for now. We’ll wrap up the series finishing up the exterior and a few odds and ends. Thanks for watching!
Rabu, 23 Maret 2016
Starting the Rocket Mass Heater
Today I finished building and fired up the rocket mass heater for the geodesic dome. Ironically, its January and were having record breaking warm temperatures in the 50s but I couldnt resist and started it up. I will do a full video about the construction in the future, but wanted to share a few pictures of it. This heater is a bit different than some you may see. I wanted to be sure there was enough drafting in the chimney so I doubled up the barrels.
 The entire burn tunnel is buried under the floor. It took a little while to get the drafting to start. It didnt help that the internal chimney wasnt insulated yet (missing some parts for it), but once the system got warmed up, it turned into a raging inferno.
 A picture without the flash shows how well the fuel is burning in the tunnel.
 I ran out of sand so I wasnt able to completely bury the horizontal exhaust. It was quite hot to the touch, but as you moved down the pipe, I could hold my hand against the duct and it was slightly warm. It was quite funny to see the sand around the duct drying out so quickly. It will be interesting to study the temperatures along the system in the future!

Read more
Langganan:
Postingan (Atom)

