Tampilkan postingan dengan label cost. Tampilkan semua postingan

Jumat, 22 April 2016

Sanding and Finishing Plywood Flooring Cost Estimate

,
https://youtu.be/p-ZlH9lwnso
Plywood flooring is complete!  I could not be happier with  how this turned out and may end up doing the other rooms in our home with this same process. If you have not seen the process of creating the plywood flooring please check out the article here or the full video here.


Before I got started with staining I chose to run over the entire floor with a 150 grit power sander. I did not spend a whole lot of time on it just enough to take any dings, dents, and scuff marks out that I most likely added while installing the flooring. Once this was done I cleaned the entire room as best as possible with a vacuum and damp towels and we were ready for stain.

http://amzn.to/1jxBmnY

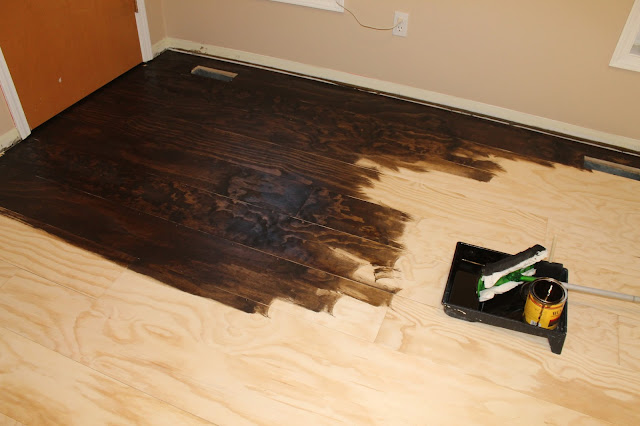
I chose a Minwax dark walnut stain to give the floor a dark old farmhouse kind of look. You can apply this stuff many ways but what I found to be the best was a homemade creation as usual:) I used an old Swiffer mop handle and head and stuck a cotton t-shirt to it. I dipped the contraption in the stain using a paint tray and then spread it on the flooring. This saved my back, a lot of time, and applied the stain fairly evenly.


  After the first coat things were starting to look really good but a little bit lighter than we had hoped.


 Two coats of the stain were applied about 24 hours apart which gave the floor a deep rich color that we absolutely loved. It was really starting to come together now. This is the point at which I began feeling relieved that this project was going to turn out exactly  how we wanted it to.

http://amzn.to/1O2bSHJ

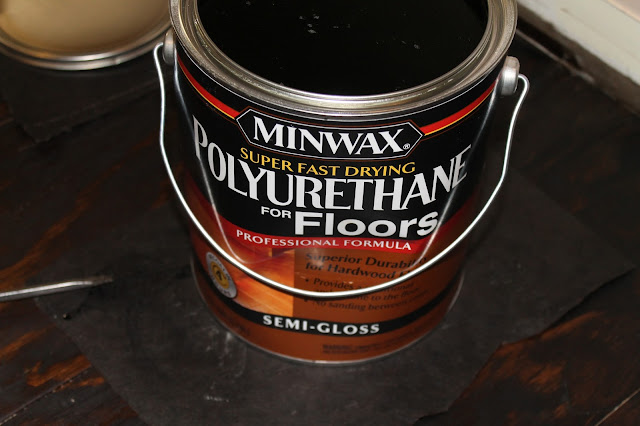
Once the stain fully dried we were ready to start putting on the final protective coating. We chose a Minwax flooring polyurethane to seal the floor.  This seemed to be the best, most durable, and easiest to apply option.


I started applying the poly one coat at a time with a small paintbrush. This method worked very well and although a bit slow, this stuff goes on very easily. I applied 4 coats of poly allowing each coat to dry for 6-12 hours before putting on the next. This is a quick drying poly so you can put it on in as little as 4 hours if you would like.  I did not sand between coats; as directed this stuff is supposed to dry pretty flat without needing to sand each coat.


 After 4 coats were applied I chose to do one round of sanding to knock out a few bumps I was starting to notice and some dog hair that somehow floated into the room and had dried into the finish, stinkin dog! I used a power sander with 220 grit paper and I did not push very hard at all while sanding. I just let the weight of the sander float on the floor until it was smoothed over very lightly.


Next I cleaned the floor with a damp cloth and applied the final coat of poly. I applied this final coat a bit thicker and let it dry over night.


After the final coat was dry the floor was safe to walk on and inspect and it looks awesome! It turned out much better than I could have imagined and the poly makes the flooring so durable. Even though this is a "soft" wood (pine) it is now very hard and resists scratches and scuffs very well. I will do a follow up on this project next year and update on how well it holds up to the changes in seasons and wear and tear or a 9 year old:)  

How much did it cost? The room that I was covering was about 165 square feet and the total cost was about $253. This works out to about $1.50 per square foot and is much cheaper than traditional hardwood flooring.


Check out the full video here


Dark Walnut Stain - http://amzn.to/1jxBmnY
Polyurethane - http://amzn.to/1O2bSHJ
Porter Cable Brad Nailer - http://amzn.to/1O2chdh

All of these products and more recommended items from the SSL Family are available at the Simple
Suburban Living General Store
http://astore.amazon.com/simpsubulivi-20


Please follow us on....
http://www.pinterest.com/simplesuburban/
http://www.facebook.com/simplesuburbanliving
http://www.twitter.com/simplesuburban5
http://www.instagram.com/simplesuburbanliving


Read more

Minggu, 10 April 2016

Solar Power and Net Zero

,
Rainbow over the winner of the 2011 Solar Decathlon


An awesome thing about living in DC is access to events. This fall the Department of Energy held a Solar Decathlon, showcasing almost 20 homes that incorporated solar energy with various energy-saving designs to achieve "net zero" energy use.

Unfortunately, these were houses where folks would live, not greenhouses. But many of the ideas still apply. Some of my favorite ideas out of this conference:
  • Grey water collection and treatment (the winning home used this in a water feature, eventually resulting in water clean enough to water their garden).
  • Vaccuum tube solar water heaters (the winning home used this in a vertical wall that was absolutely gorgeous)
  • Passive heating or cooling


Read more

Selasa, 29 Maret 2016

15 How Much does this Cost Under 1000

,

Heres a run down of the amount I paid for this system, with suggestions on how you can reduce costs even further.

Tanks - $440 - I was able to get the Rubbermaid stock tanks at a local farming coop for $70 and $80 for the 50-gallon and 100-gallon tanks, respectively. I think youd need 3 IBC units to make something similar out of IBC, so that wouldnt save much cost. However I understand that its possible to get 55-gallon barrels for free from local beverage processing plants. The downside of 55-gallon barrels is youll have to spend more on plumbing, youll have a lot more cutting to do, and the end result will look like hack-sawed plastic. But free is free.

Hoop house - $100 - If you use pressure-treated landscape lumber for the base, 3 mil sheeting, and 1/2" EMT conduit, the total price rolls in at around $100. You could slightly reduce costs for the frame by using PVC. Or you can decide you dont need protection at all, if youre in a climate that doesnt require protection from excess sun, rain, or cold.

Pumps and timer - $110 - I was able to find my 800 gph pump at a local hydroponics store for $60, and you can get an air pump sufficient to aerate 100 gallons for $30. Tubing and air stones round the total amount upwards to $100. One option is to dispense with the air pump, if you pump some of your water over the surface of the fish tank, oxygenating the water the way a pond fountain does. There are ways to use wind power to drive something like a rope pump, but I dont think that is cheaper than an electric pump (though awfully fun to make). I do use a timer to turn my water pumps off at night, which is another $5-10.

Plumbing - $100 - I used 3" pipe for media guards (4 feet), 2" pipe for bells (4 feet), 1" pipe to connect the tanks (10 feet), and lots of 3/4" pipe for upstands and drains (10 feet). Add in the elbows and adapters, caps, and o-rings and youre up around $40. I used garden hose that is drinking water safe to carry water from my sump tank to the grow beds, so two 50 foot lengths, adapters, and Y splitters ran me $60. You could reduce cost by having a simple standpipe and using a timer to turn the water on intermittently, though your water pump capacity may need to increase. As for plumbing between the sump and the beds, you could plumb that with PVC pipe and elbows. If you find a cheaper way to do it, after tallying all the costs, go for it.

Grow bed supports - $60 - I used cinder blocks (16 @ $2.50) and 2x6 planks (4 @ $5) to support the grow beds. If you are able to dig your tanks down into the ground, you can cut back on the number of cinder blocks required. If you can find such materials second hand, thatd be great.

Floating Raft - $40 - I was able to get a 2x8 sheet of 2" extruded polystyrene for $15, and the 2" net pots cost $0.39 apiece. I suppose you could come up with some kind of wood float supported on empty water bottles and used (drilled) plastic containers.

Media - $ to $$$ - If youve got a pile of 3/4 gravel out back, this could be free. If you fill all four grow beds with Hydroton (@ $40 per 50L bag), you could be spending about $600.

So the basic system as Ive got it here (including a floating raft bed) is $850. I love Hydroton, but I know of a friend who got an entire truckbed full (1250L) of expanded shale for under $60. So you can create an extended-season, vegetable-growing, fish growing water storage system for under $1000.
Read more
 

Easy anf Fun Make an Aquaponics Copyright © 2016 -- Powered by Blogger